Monday, September 27, 2010

Viva Vintage!!!

I am so in love with this, I had to share.

Am I crazy... (my boyfriend would say "stop right there, YES!") 
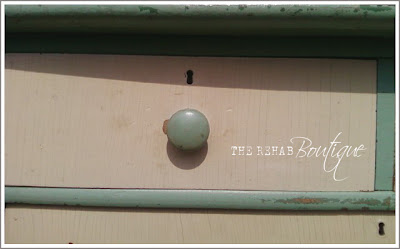
okay, let me finish... for loving this vintage dresser?

  
It came straight out of a cottage on the lake.
Don't you just love these little Danish Girl & Boy decals?


I didn't have to do much to it, but it was a little grungy.  
So I took the sander to it, then went over the edges with Howards Beeswax, which brings out the richness of the wood. 
(I do this on all my distressed pieces.)


Look at the patina now, woo hoo! These colors are amazing!


It even has a hinged towel rack on the side!


So this is the before...


And here's the after...  
It's for sale!!! A bargain at $160!!


Now linking to:


Monday, September 20, 2010

A Bit of Whimsy (Chair Makeover)

Here's just a little snap shot of how the chair came 
out once it was painted, distressed and recovered.


Here's the before...
I'm not a big fan of dark furniture, it's a bit too conservative.


It's not a bad looking chair, but it needed some personality. 
Once I saw the fabric my client (Amy) picked out, I knew it had to be painted! 
Although it did take a little arm twisting : )


It's looking better already!


Here's the final outcome!
Amy was reluctant to have it painted, 
but she was very pleased with how it turned out!
 A BIG sigh of relief from me : )


Just the touch of whimsy her room needed.


It's got that great Shabby Chic look! 


Now all the beautiful detail comes shining through!
I'm so glad you like it Amy!

Now Linking to:


Thursday, September 16, 2010

Hinged Box Re-do & Child's Rocker

First up....  Adorable Child's Rocker


This is how it looked before...


This is being re-done for a little boy's first birthday!


Happy Birthday!  We hope you like it!


Next up...   Storage/Toy Box Makeover 
Here's the before. Not too pretty, 
but the hinges are great and I love boxes of any kind!


I wanted to keep this fairly simple, 
so I decided to paint it all one color, Parchment White.


Hinges and all! Keeping it all one color gives 
it a simple and updated look with a little bit of glam!


While working with this piece, I realized it was a pain 
in the but to move around, so I added some fancy rope handles.


The inside wasn't too pretty either, so I decided to line it with some pretty fabric. 
First, I sewed a fabric box and hemmed the edge, attaching the fabric with upholstery tacks.


I wouldn't mind putting anything in here now!
It could be used as a toy box for a little girl, or storage for any big girl!

Now linking to:

Monday, September 13, 2010

Perfect For Your Little Princess!

Mini Vanity & Chair Makeover
Cute little girl's vanity and chair!

Here's the before... 
Can you believe I picked these up the same day, 
but at different tag sales?  
What luck!!!
First things first...
I covered the top of the vanity with embossed 
wallpaper and painted both Parchment White.
Then...
I made the skirting.  
I decided to add piping along the top as the trim 
and attached with upholstery tacks, 
pleating the skirt evenly as I went around.


(Sorry... I didn't take any during pics)
I already had this little wicker mirror, 
I thought it would make a perfect threesome!
I painted it the same color as the chair and vanity, 
then dry brushed it a bit with brown and a 
little aqua paint to make it look aged.

How cute! 
Perfect for a little princess!

Now linking to

Monday, September 6, 2010

Curbside Rescue & Then Some!

Little Dresser Rehab & Some Accessories!


This piece needed a lot of TLC
The poor thing was put out to the trash and it was calling my name!

(I can't stand to see something go to the dump 
when it has potential and can easily be rehabbed.)


What a mess!  Now look at it! 


I put the drawer with the missing edge down at the bottom, 
so it's less noticeable, it is shabby chic after all! 


I also lined all the drawers with pretty paper!

Now this chair and handmade pillow have the perfect companion...

Along with my new Memo Boards. I love the way these came out!


I couldn't use the wallpaper on the back of these because of the shape, 
so I used fabric attached with upholstery tacks.


It can be hung horizontally or vertically!


I am using these to display some of the vintage jewelry in the shoppe.


 I love this red frame!


I hope you have enjoyed one of my many rehab projects!


Now linking to 

Metamorphosis Monday!


The DIY Show Off!


Transformation Thursday!

Friday, September 3, 2010

A Coat Rack with Character!

I am so excited about this project! 
Not much $, a little bit of time and an awesome outcome!

 
For the base I used a piece of wood that was an inset 
panel on a door, which already had a great patina (and it was free)


I found a bag of antique hooks at a tag sale (for a buck)!


I already had everything else I needed!


At first I was thinking of using a stencil, but this was much quicker!

I used a paint brush to cover the stamp with paint and 
experimented on paper until I felt comfortable with the outcome.


 I ended up stamping two layers, the yellow green didn't show up like I 
thought it would and I knew I couldn't get it exactly on top of the green so it ended up 
being more of a shadow under the antique white, giving it more depth.


I added a layer of decoupage medium in order to seal the 
chippy paint.  It also gave it a nice sheen and a more finished look.


Here it is in full view. It's a little hard to see the detail in this picture, 
but it's not quite this subtle in person.  I'm very happy with the outcome!

[Ooh-- I need to paint my front door!]


I'll have to make a bunch and put them in the shop!

What do you think?
I love hearing from you!

Now linking to:


LinkWithin

Related Posts with Thumbnails